


For this months Blog Hop We are doing fun fold cards, I am doing a triangle fold
This is not a hard fold but lots of steps. So i am going to jump right in to how i made the card.
I hope when you are done checking out my post, you will hop on over to the other members of the crative card- iology teams blogs to see what fun fold cards they have made
Thanks for stopping by
Bonnie~
Stop over to the other members to see there Fun Fold Card
Details :
Base card 8 1/2 x 5 1/2 cherry cobber score at 4 1/4
Layer 1 need (2) 5 1/4 X 4 whisper white
Layer 2 DSP 5 x 3 3/4
scrap white for stamping
List of supplies and stamp set below the tutorial
Step 1 take cherry cobber 8 1/2 x 5 1/2 and score it at 4 1/4,
Then on the 5 1/2 side
using the top of your card you are going to find the center (see photo)
2 3/4 make a pencil make
 |
Step 2 Now you are going to turn your card to the 81/2 in side
Still using the top of the card you need to mark the center
2 1/8 mark with a pencil do this on both sides

Step 3 we are now going to score from the 4 1/4 score line to the pencil mark in the middle 2 3/4
then you are going to score from the 2 1/8 score mark on the side to the pencil mark in the middle 2 3/4
do this on both side see photo below
Step 4 fold on the score lines should look like last photo


Step 5 we are going to glue down the flaps will look like last photo. You have just made the fun fold now time to dress it up


Step 6 Take one of your 5 1/4 x 4 whisper white and on the 5 1/4 side you need to fine the center 2 5/8 make a pencil mark

Step 7 we are going to need your trimmer we are going to cut for the top corner to the the pencil mark
see photo

Step 8 you will need to repeat that the DSP
the Dsp pencil mark is 2 1/2


Step 9 layer the whisper white and the DSP together and add the to the cherry cobber


Step 10 take the other whisper white 5 1/4 x 4 and fine the center 2 5/8 make a pencil mark
cut the same as you did in the last step 7
this time will only need the middle piece

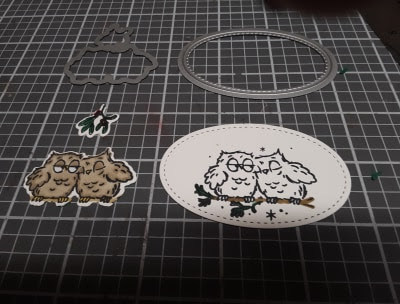
Step 11 Now we are going to stamp, color and die cut
as seen in photo Blends i used are listed in the supplies list below
Step 12 add the middle triangle from Step 10 to the middle in side of the card
you have finished the Triangle Fold card Hope you have enjoy the Tutorial

") | ||
 |  | |
 |


 Designer Series Paper")


Wow, I don’t think I’ve seen this fold before! The owl couple is really sweet!
ReplyDeletethanks Jessica, it is a new fold out there in the web world. not many have done them.
DeleteJessica was right WOW!!! That is so cool. I might have to case this one. Great job!
ReplyDeletecase away.
DeleteAwesome card!!!
ReplyDeleteLove the fold! and the plaid paper! and the owls! Just love it all!
ReplyDeleteWow...definitely lots of steps but your tour tutorial is awesome and your hard work is appreciated!
ReplyDelete